 HTML/CSS
 JavaScript
'%3e%3cpath%20d='M23.5602%2010.93L13.0602%200.430002C12.774%200.158498%2012.3946%200.00714111%2012.0002%200.00714111C11.6057%200.00714111%2011.2263%200.158498%2010.9402%200.430002L8.94018%202.43C8.89332%202.47648%208.85612%202.53178%208.83074%202.59271C8.80535%202.65364%208.79228%202.719%208.79228%202.785C8.79228%202.85101%208.80535%202.91636%208.83074%202.97729C8.85612%203.03822%208.89332%203.09352%208.94018%203.14L10.7402%205C10.8095%205.06923%2010.8977%205.11656%2010.9937%205.13611C11.0897%205.15567%2011.1893%205.14659%2011.2802%205.11C11.5851%204.99232%2011.9142%204.95115%2012.2387%204.9901C12.5632%205.02905%2012.8732%205.14693%2013.1416%205.33342C13.41%205.51992%2013.6286%205.76934%2013.7782%206.05988C13.9279%206.35041%2014.0041%206.6732%2014.0002%207C13.9976%207.25396%2013.9467%207.5051%2013.8502%207.74C13.8136%207.83089%2013.8045%207.93052%2013.8241%208.02652C13.8436%208.12253%2013.891%208.21067%2013.9602%208.28L15.7202%2010C15.7895%2010.0692%2015.8777%2010.1166%2015.9737%2010.1361C16.0697%2010.1557%2016.1693%2010.1466%2016.2602%2010.11C16.6565%209.95224%2017.0928%209.9253%2017.5055%2010.0331C17.9182%2010.1409%2018.2856%2010.3779%2018.554%2010.7093C18.8225%2011.0407%2018.978%2011.4493%2018.9978%2011.8754C19.0176%2012.3014%2018.9006%2012.7227%2018.664%2013.0776C18.4274%2013.4325%2018.0836%2013.7024%2017.6827%2013.848C17.2818%2013.9936%2016.8448%2014.0073%2016.4356%2013.8869C16.0264%2013.7666%2015.6664%2013.5185%2015.4082%2013.1791C15.1499%2012.8396%2015.007%2012.4265%2015.0002%2012C15.0033%2011.7568%2015.0507%2011.5162%2015.1402%2011.29C15.1747%2011.2004%2015.1826%2011.1028%2015.1631%2011.0088C15.1436%2010.9148%2015.0975%2010.8285%2015.0302%2010.76L13.3502%209.07C13.2803%209.00148%2013.1918%208.95498%2013.0958%208.93626C12.9997%208.91754%2012.9003%208.92742%2012.8098%208.96469C12.7193%209.00195%2012.6417%209.06496%2012.5867%209.14589C12.5316%209.22683%2012.5016%209.32214%2012.5002%209.42V14.7C12.4998%2014.7976%2012.5281%2014.8931%2012.5814%2014.9749C12.6347%2015.0566%2012.7107%2015.121%2012.8002%2015.16C13.2213%2015.3438%2013.5663%2015.667%2013.7772%2016.0752C13.988%2016.4835%2014.0519%2016.9519%2013.958%2017.4017C13.8641%2017.8514%2013.6182%2018.2552%2013.2617%2018.545C12.9051%2018.8348%2012.4597%2018.993%2012.0002%2018.993C11.5407%2018.993%2011.0952%2018.8348%2010.7387%2018.545C10.3821%2018.2552%2010.1362%2017.8514%2010.0424%2017.4017C9.9485%2016.9519%2010.0124%2016.4835%2010.2232%2016.0752C10.4341%2015.667%2010.7791%2015.3438%2011.2002%2015.16C11.2896%2015.121%2011.3657%2015.0566%2011.419%2014.9749C11.4723%2014.8931%2011.5005%2014.7976%2011.5002%2014.7V9.28C11.5005%209.18242%2011.4723%209.08687%2011.419%209.00513C11.3657%208.92339%2011.2896%208.85904%2011.2002%208.82C10.7271%208.61271%2010.3526%208.23047%2010.1551%207.7533C9.95748%207.27612%209.95215%206.74102%2010.1402%206.26C10.171%206.16762%2010.1742%206.06826%2010.1493%205.97411C10.1244%205.87995%2010.0726%205.79511%2010.0002%205.73L8.19018%203.88C8.1437%203.83314%208.0884%203.79594%208.02747%203.77056C7.96654%203.74517%207.90119%203.7321%207.83518%203.7321C7.76918%203.7321%207.70383%203.74517%207.6429%203.77056C7.58197%203.79594%207.52667%203.83314%207.48018%203.88L0.480184%2010.88C0.199283%2011.1613%200.0415039%2011.5425%200.0415039%2011.94C0.0415039%2012.3375%200.199283%2012.7188%200.480184%2013L10.9802%2023.51C11.2614%2023.7909%2011.6427%2023.9487%2012.0402%2023.9487C12.4377%2023.9487%2012.8189%2023.7909%2013.1002%2023.51L23.6002%2013C23.8811%2012.7188%2024.0389%2012.3375%2024.0389%2011.94C24.0389%2011.5425%2023.8811%2011.1613%2023.6002%2010.88L23.5602%2010.93Z'%20fill='white'/%3e%3c/g%3e%3cdefs%3e%3cclipPath%20id='clip0_1481_6122'%3e%3crect%20width='24'%20height='24'%20fill='white'/%3e%3c/clipPath%3e%3c/defs%3e%3c/svg%3e) Git
Git'%3e%3cpath%20d='M16.6011%202.00588H15.7556L15.7372%201.99342C15.0469%201.51665%2013.7032%200.590486%2011.8634%200.855279C11.8664%200.859491%2011.8678%200.864404%2011.8706%200.868615C10.5059%201.09463%208.97767%202.15872%208.46774%203.59394C7.97588%204.97669%208.35649%206.63985%209.60026%208.53868L11.5022%2011.4449C14.3783%2010.0069%2014.2755%207.81624%2014.2142%206.50737C14.2051%206.31452%2014.1991%206.17502%2014.1991%206.05113C14.1991%205.67842%2014.5008%205.37695%2014.8733%205.37695C15.246%205.37695%2015.5475%205.67842%2015.5475%206.05113C15.5475%206.15589%2015.5535%206.27433%2015.5594%206.40278C15.6279%207.8645%2015.7661%2010.8206%2012.1054%2012.651C11.8769%2012.7654%2011.4979%2012.9909%2011.2673%2012.9909C11.046%2012.9909%2010.8307%2012.8822%2010.7024%2012.6861L8.47178%209.27743C6.98567%207.00712%206.55645%204.943%207.19694%203.14226C7.3396%202.7413%207.53614%202.39631%207.75057%202.07572C3.41438%202.59969%200.00470058%206.30276%200.0029458%2010.8679C-0.0130225%2011.5476%20-0.0270607%2013.6156%201.77508%2016.2716C2.40451%2017.2%202.73774%2018.3601%202.73774%2019.6268V21.558C2.73774%2021.9307%203.03921%2022.2321%203.41192%2022.2321H6.10864C6.48135%2022.2321%206.77387%2021.9307%206.77387%2021.558V18.1869H9.47971V21.558C9.47971%2021.9307%209.78136%2022.2321%2010.1541%2022.2321H12.8508C13.2235%2022.2321%2013.516%2021.9307%2013.516%2021.558C13.516%2018.9434%2014.0603%2016.6015%2015.1625%2014.3978L15.9283%2012.8663L17.2293%2013.083C18.2082%2013.2462%2018.9187%2014.085%2018.9187%2015.078V16.1643C18.9187%2016.7167%2018.1609%2017.0328%2017.7678%2016.6409C17.5046%2016.3776%2017.0778%2016.3776%2016.8144%2016.6409L14.9089%2018.5464C14.6457%2018.8098%2014.6457%2019.2364%2014.9089%2019.4998C16.0501%2020.6421%2017.6769%2021.1082%2019.2571%2020.7462C21.2666%2020.2859%2023%2018.0539%2023%2015.8725V8.36864C23%204.86%2020.1099%202.00588%2016.6011%202.00588ZM18.2446%208.74802C17.8724%208.74802%2017.5704%208.44603%2017.5704%208.07367C17.5704%207.70131%2017.8724%207.39949%2018.2446%207.39949C18.6169%207.39949%2018.9189%207.70131%2018.9189%208.07367C18.9189%208.44603%2018.6169%208.74802%2018.2446%208.74802Z'%20fill='white'/%3e%3c/g%3e%3cdefs%3e%3cclipPath%20id='clip0_1481_6112'%3e%3crect%20width='23'%20height='23'%20fill='white'/%3e%3c/clipPath%3e%3c/defs%3e%3c/svg%3e) PHP
PHP Freelance
'%3e%3cpath%20d='M1.41413%2011.974C1.49937%2011.9879%201.58563%2011.9944%201.67193%2011.9932L16.3679%2011.9933L16.0474%2012.1435C15.7342%2012.293%2015.4492%2012.4964%2015.2053%2012.7445L11.0842%2016.899C10.5414%2017.4214%2010.4502%2018.2616%2010.8681%2018.8899C11.3544%2019.5594%2012.287%2019.7048%2012.9512%2019.2145C13.0048%2019.1749%2013.0558%2019.1317%2013.1038%2019.0852L20.556%2011.5725C21.1384%2010.9861%2021.1389%2010.0347%2020.5572%209.44762C20.5568%209.44725%2020.5564%209.44682%2020.556%209.44645L13.1038%201.93376C12.5209%201.34781%2011.5772%201.34913%2010.9959%201.93671C10.9502%201.98296%2010.9075%202.03217%2010.8681%202.08401C10.4502%202.7123%2010.5414%203.55255%2011.0842%204.07487L15.1978%208.2369C15.4165%208.45759%2015.6679%208.64264%2015.9431%208.78533L16.3902%208.98817L1.75396%208.98817C0.992568%208.95967%200.324563%209.49584%200.181527%2010.2503C0.0497616%2011.0694%200.601603%2011.8411%201.41413%2011.974Z'%20fill='white'/%3e%3c/g%3e%3cdefs%3e%3cclipPath%20id='clip0_520_10'%3e%3crect%20width='20.8311'%20height='21'%20fill='white'%20transform='translate(20.9932%2021)%20rotate(-180)'/%3e%3c/clipPath%3e%3c/defs%3e%3c/svg%3e)

Hosting a web application's front-end with Netlify

NicolasBrondinBernard
Tired of using 4 different services to host the front end of your web applications?

Article published on 15/07/2021, last updated on 10/08/2026
When it comes to hosting a front-end application, cloud solutions are often split into several services that need to be linked together and automated to make deployment easier.
We can take AWS as an example, where you'll need to use 3 independent services: S3 (file storage + web server configuration), Cloudfront (CDN) and ACM (SSL certificates).
If you'd like to find out how to host a static site with AWS, I have a full tutorial available here!
And that's without even mentioning automation and CI/CD, because most of the time you'll have to configure your workflow yourself, externally...
What is Netlify?
Netlify is a cloud hosting service specialized in automating the deployment process for web applications, a kind of all-in-one service.
This means that from a simple Git repository hosted on GitHub, GitLab or BitBucket, you can automatically trigger your build phase, deploy your application behind a CDN, with a domain name and an SSL certificate (by default).
In short, this lets you automate the hosting of any React, Vue, Angular application and many others by pushing updates directly to a specific branch of your remote Git repository.
Does this only work with front-end applications?
No, but it's most often for this type of project that the platform is used. Plus, there's a very interesting free plan that lets you host all your projects and prototypes in just a few clicks!
How do you do it?
Step 1: The Git repository
The first step is to use GitHub, GitLab or BitBucket to host your code's version control, because Netlify will connect directly to the remote repository (with your authorization).
Once your repository is created, push the latest working version of your application to your main (or master) branch before starting the next step.
Step 2: Create a Netlify account
The advantage with Netlify is that creating an account doesn't even require you to enter your credit card, so you can test the service with total peace of mind, without worrying about waking up to a bill out of nowhere.
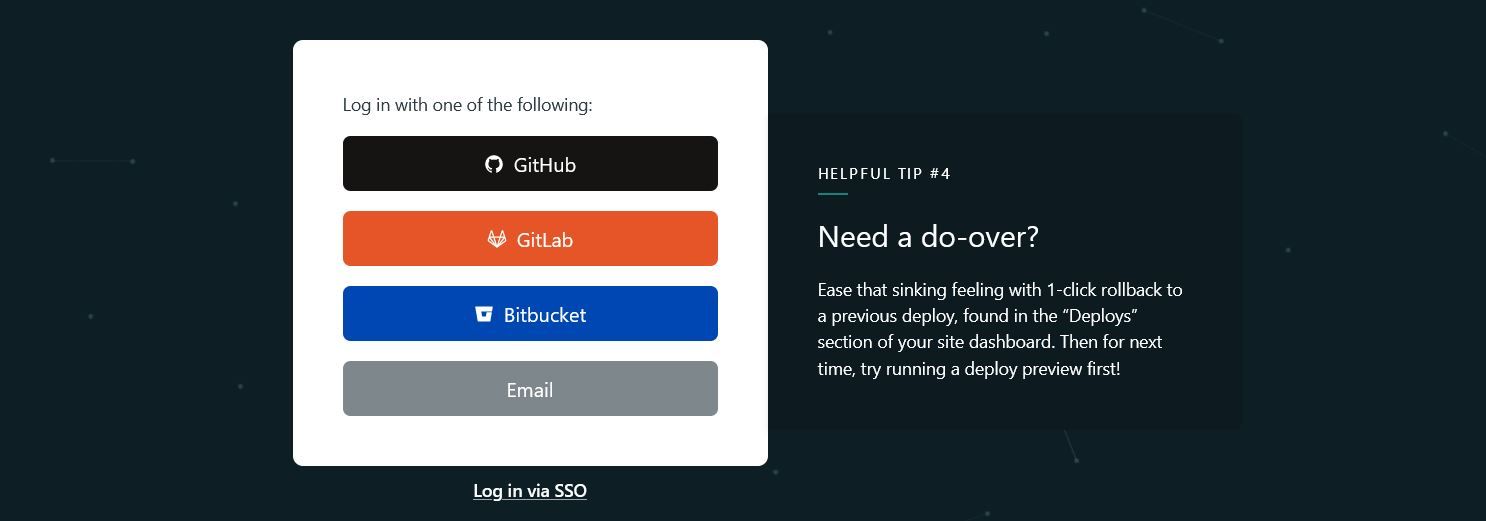
You can create an account with your email, but it's also possible to sign in with one click using your GitHub, GitLab or BitBucket account!
Here's the link to sign up: https://app.netlify.com/signup
Step 3: Create a new site
Even with a free plan, there's no restriction on the number of sites you want to deploy (but there is a maximum number of build minutes and bandwidth).
To continue, click the "New site from Git" button at the top right, as shown below, and follow the guide.
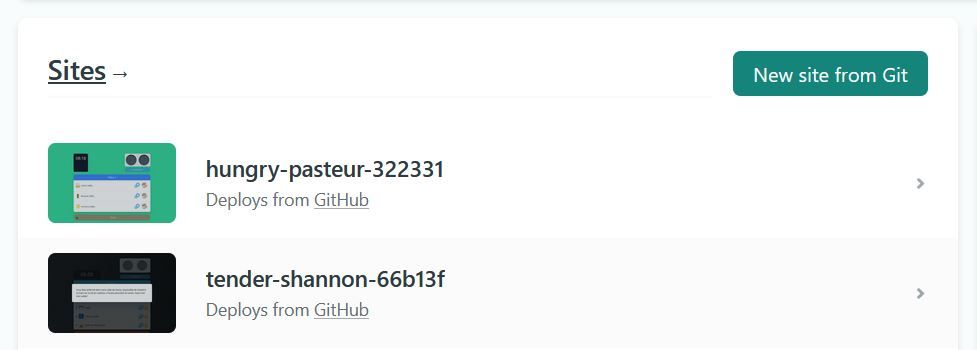
You'll then need to indicate the online version control service you're using, and you'll be prompted to authorize Netlify to connect to it so it can display the list of your repositories.
Once that's done, select the project you want to deploy to move on to the next step.
Step 4: Configure CI/CD
For Netlify to be able to build your application before deploying it, you'll need to specify the branch you want to use, the command to run to launch the build, as well as the directory where the build files will be available.
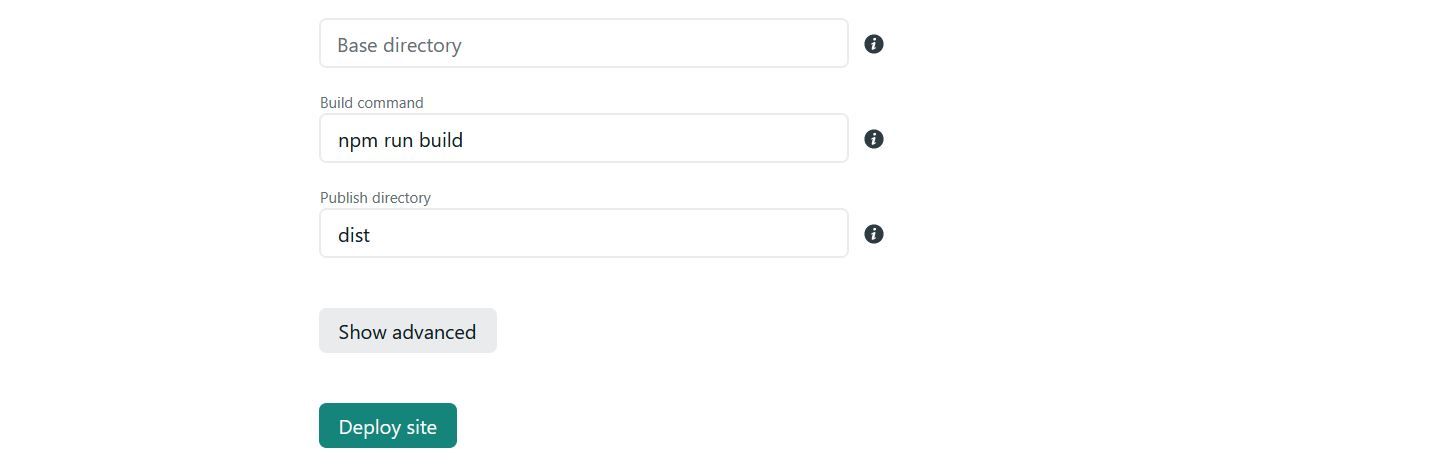
Most of the time, Netlify will manage to pull this info out on its own from your package.json, but if your build is configured a bit differently, you'll need to specify it to the platform.
Step 5: Check the build phase
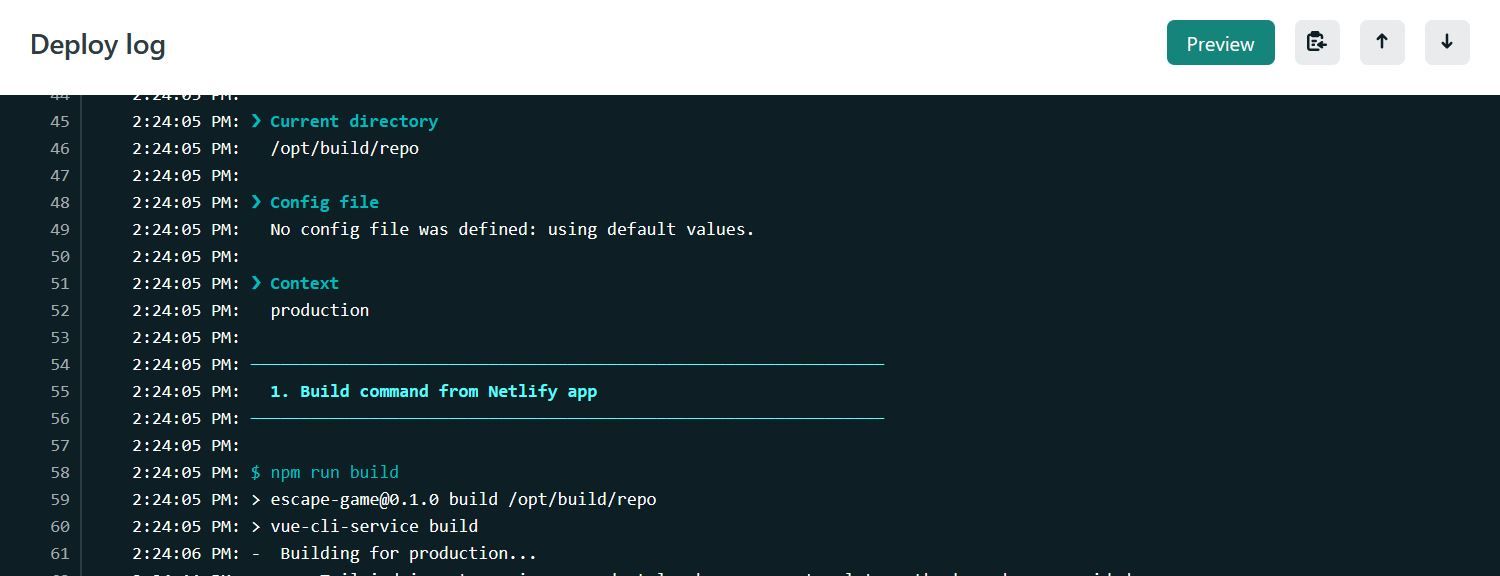
Once the site is configured, the first build should launch automatically.
For this one and all subsequent builds, you'll be able to access the logs in real time directly from the platform. If there's ever an issue, you'll simply need to fix it in your local repository, push the change, and a new build will start!
Step 6: Test the application live
Once all the previous steps are complete, you'll be able to access your application via a URL in the form:
https://[keyword]-[keyword]-[hash].netlify.app/
With a valid SSL certificate AND hosted behind a CDN, all in just a few clicks. Happy deploying!
 Our complete courses
'%3e%3cpath%20fill-rule='evenodd'%20clip-rule='evenodd'%20d='M72.5155%2012.5718C75.6945%2015.8057%2078.2525%2019.5301%2080.1125%2023.679C81.3145%2026.3623%2082.3435%2029.1243%2083.4505%2031.8492C83.6375%2032.3111%2083.7765%2032.8053%2084.0355%2033.2246C84.6475%2034.2217%2085.7315%2034.5465%2086.8145%2034.1274C87.8715%2033.7195%2088.3955%2032.7253%2088.1515%2031.5451C88.0755%2031.1786%2087.9465%2030.8219%2087.8105%2030.4722C86.9775%2028.3103%2086.1515%2026.1476%2085.2915%2023.9968C83.1765%2018.7014%2080.1335%2013.9697%2076.2523%209.82479C72.7447%206.07839%2068.6287%203.12639%2063.7022%201.48819C57.4127%20-0.603812%2051.2075%20-0.547513%2044.9948%202.02189C39.4996%204.29209%2035.0439%207.73379%2031.711%2012.6458C31.5036%2012.9502%2031.2574%2013.2266%2031.0268%2013.5179C29.915%2013.4715%2028.8561%2013.3969%2027.7982%2013.3869C22.9432%2013.3447%2018.3994%2014.7386%2013.967%2016.5243C9.59841%2018.2828%205.56591%2020.6962%201.54961%2023.131C1.23141%2023.325%200.904509%2023.5281%200.643609%2023.7892C-0.0963912%2024.5355%20-0.200491%2025.6562%200.342808%2026.5603C0.828308%2027.3659%201.83521%2027.8%202.78011%2027.5321C3.25281%2027.3987%203.70351%2027.1552%204.13371%2026.9099C5.82041%2025.9496%207.49191%2024.9658%209.17171%2023.9963C13.5938%2021.4452%2018.2545%2019.5026%2023.2628%2018.4322C24.9852%2018.0641%2026.7172%2017.9384%2028.7371%2018.038C28.4581%2018.917%2028.271%2019.5699%2028.0472%2020.2096C26.67%2024.1467%2026.5267%2028.1778%2027.1522%2032.2608C27.6029%2035.2162%2028.8732%2037.7537%2031.2161%2039.6622C33.4854%2041.5118%2036.0875%2041.9447%2038.8101%2040.9617C41.0438%2040.156%2042.8658%2038.6736%2044.0441%2036.5888C46.8425%2031.6348%2047.0464%2026.603%2044.2229%2021.5701C42.7367%2018.9202%2040.5312%2017.0235%2037.8341%2015.6694C37.237%2015.3705%2036.645%2015.0612%2036.0884%2014.7741C36.1468%2014.5219%2036.1423%2014.3816%2036.2057%2014.2889C36.4175%2013.9774%2036.6413%2013.675%2036.879%2013.3854C39.3546%2010.384%2042.3928%208.17019%2045.9575%206.58539C50.4698%204.57989%2055.0793%204.08149%2059.8924%205.16149C64.8992%206.28519%2068.9941%208.99209%2072.5155%2012.5718ZM41.594%2029.1476C41.5152%2030.918%2041.1023%2032.5993%2040.1694%2034.1291C39.5697%2035.114%2038.7683%2035.8803%2037.7415%2036.3967C36.28%2037.1301%2034.9842%2036.9271%2033.7986%2035.8031C32.6715%2034.7343%2032.0038%2033.4128%2031.7388%2031.8996C31.0008%2027.6748%2031.4326%2023.5754%2033.1597%2019.6328C33.2535%2019.4133%2033.4078%2019.2186%2033.5245%2019.0287C38.275%2019.976%2041.8043%2024.4206%2041.594%2029.1476Z'%20fill='black'/%3e%3cpath%20fill-rule='evenodd'%20clip-rule='evenodd'%20d='M102.266%2020.8839C101.352%2020.2756%20100.13%2020.4026%2099.3588%2021.2292C99.0208%2021.5933%2098.7528%2022.026%2098.4788%2022.4428C96.5528%2025.3735%2094.6639%2028.3264%2092.6999%2031.2312C91.5439%2032.9398%2090.2908%2034.5849%2089.0488%2036.2335C88.6758%2036.7311%2088.2468%2037.2126%2087.7568%2037.5863C85.7018%2039.1532%2085.0969%2038.8619%2083.7259%2037.4394C82.5589%2036.2278%2081.4588%2034.9302%2080.4798%2033.5586C78.8108%2031.2187%2077.2609%2028.7911%2075.657%2026.4008C75.343%2025.9337%2075.0504%2025.4451%2074.6842%2025.0228C73.8576%2024.0693%2072.6388%2023.9134%2071.6428%2024.5858C70.7481%2025.1888%2070.4458%2026.3239%2070.908%2027.4234C71.0299%2027.7102%2071.1897%2027.9832%2071.3645%2028.2417C73.2453%2031.0478%2075.0782%2033.8887%2077.0405%2036.638C78.0899%2038.1092%2079.3228%2039.4556%2080.5508%2040.7855C81.4478%2041.7575%2082.5558%2042.4683%2083.8038%2042.9622C84.9038%2043.3991%2085.9788%2043.513%2087.1198%2043.0138C89.1478%2042.4708%2090.8458%2041.3176%2092.1638%2039.6644C93.5678%2037.9044%2094.9388%2036.1104%2096.2058%2034.251C98.3208%2031.1475%20100.341%2027.9792%20102.398%2024.8354C102.636%2024.4693%20102.888%2024.1036%20103.065%2023.7065C103.522%2022.6733%20103.169%2021.4844%20102.266%2020.8839Z'%20fill='black'/%3e%3c/g%3e%3cdefs%3e%3cclipPath%20id='clip0_1990_7380'%3e%3crect%20width='103'%20height='43'%20fill='white'/%3e%3c/clipPath%3e%3c/defs%3e%3c/svg%3e)

Complete courses, exercises and certificates to really learn programming!
'%3e%3cpath%20d='M50.2142%2018.9386C49.891%2017.9389%2049.0043%2017.2289%2047.9552%2017.1343L33.7053%2015.8404L28.0704%202.65157C27.655%201.685%2026.7087%201.05933%2025.6574%201.05933C24.6061%201.05933%2023.6599%201.685%2023.2444%202.65383L17.6096%2015.8404L3.35734%2017.1343C2.31016%2017.2311%201.42571%2017.9389%201.10063%2018.9386C0.775554%2019.9383%201.07577%2021.0349%201.86794%2021.7261L12.6392%2031.1726L9.46301%2045.1637C9.2306%2046.1924%209.62988%2047.2558%2010.4834%2047.8728C10.9423%2048.2043%2011.479%2048.3731%2012.0203%2048.3731C12.487%2048.3731%2012.95%2048.2473%2013.3655%2047.9986L25.6574%2040.6522L37.9448%2047.9986C38.844%2048.5396%2039.9774%2048.4902%2040.8291%2047.8728C41.683%2047.2539%2042.0819%2046.1902%2041.8495%2045.1637L38.6733%2031.1726L49.4446%2021.728C50.2368%2021.0349%2050.5393%2019.9402%2050.2142%2018.9386Z'%20fill='%23FFC107'/%3e%3c/g%3e%3cdefs%3e%3cclipPath%20id='clip0_1229_10547'%3e%3crect%20width='49.3714'%20height='49.3714'%20fill='white'%20transform='translate(0.971436)'/%3e%3c/clipPath%3e%3c/defs%3e%3c/svg%3e)
'%3e%3cpath%20d='M18.6283%2023.5149C18.8912%2023.5149%2019.1524%2023.4328%2019.3752%2023.2717C19.7903%2022.9708%2019.9842%2022.4537%2019.8712%2021.9548L18.3273%2015.1535L23.5635%2010.5615C23.9484%2010.2255%2024.0954%209.69335%2023.9374%209.20646C23.7794%208.72049%2023.3494%208.37642%2022.8404%208.32936L15.9122%207.70038L13.1731%201.29024C12.9711%200.819283%2012.5111%200.515137%2012.0001%200.515137C11.489%200.515137%2011.029%200.819283%2010.8271%201.28914L8.08792%207.70038L1.16086%208.32936C0.650715%208.37532%200.220772%208.72049%200.062748%209.20646C-0.0952761%209.69243%200.0508457%2010.2255%200.435743%2010.5615L5.67196%2015.1526L4.12798%2021.9537C4.01482%2022.4537%204.20891%2022.9708%204.62384%2023.2708C5.03785%2023.5707%205.58993%2023.5938%206.02592%2023.3318L12.0001%2019.7617L17.9742%2023.3338C18.1762%2023.4537%2018.4012%2023.5149%2018.6283%2023.5149ZM12.0001%2018C12%2017.7763%2012.0001%2017.5%2012.0001%2017.5V17V16C12%2015.5%2012%2015%2012.0001%2014.5V12.5V11.5C12%2011%2012.0001%209.18247%2012.0001%209.18247V2.36217L14.5852%208.41231C14.7672%208.84335%2015.1723%209.13944%2015.6421%209.18247L22.1843%209.77648L17.2403%2014.1125C16.8862%2014.4225%2016.7313%2014.8986%2016.8362%2015.3566L18.2923%2021.7757L12.6541%2018.4046C12.4522%2018.2847%2012.0001%2018%2012.0001%2018Z'%20fill='%23FFC107'/%3e%3c/g%3e%3cdefs%3e%3cclipPath%20id='clip0_1843_3872'%3e%3crect%20width='24'%20height='24'%20fill='white'%20transform='matrix(-1%200%200%201%2024%200)'/%3e%3c/clipPath%3e%3c/defs%3e%3c/svg%3e) 4.8 average rating
4.8 average rating
No comments yet